A cartridge swap can soak the cabinet if pressure stays trapped. To change a standard under-sink filter, close its feed valve, relieve pressure, remove the housing, seat the new cartridge and O-ring, then flush and inspect every connection.
What to have ready before you shut the water off
Start by identifying the system under your sink. This guide covers a standard filter with a removable housing. It doesn’t cover every quick-change cartridge or reverse osmosis system. If yours has several stages and a storage tank, use the manufacturer’s instructions and our reverse osmosis filter replacement guide.
Find the model label before buying a cartridge. Match the model or part number listed by the manufacturer. A cartridge that looks similar may not seat correctly. Check its required orientation too. Some cartridges have a clear top and bottom.
Gather these items before closing the valve:
- The correct replacement cartridge
- The system’s housing wrench, if required
- A shallow bucket or tray
- Several absorbent towels
- A clean cloth
- The manufacturer’s instructions
- A replacement O-ring that matches the housing, if needed
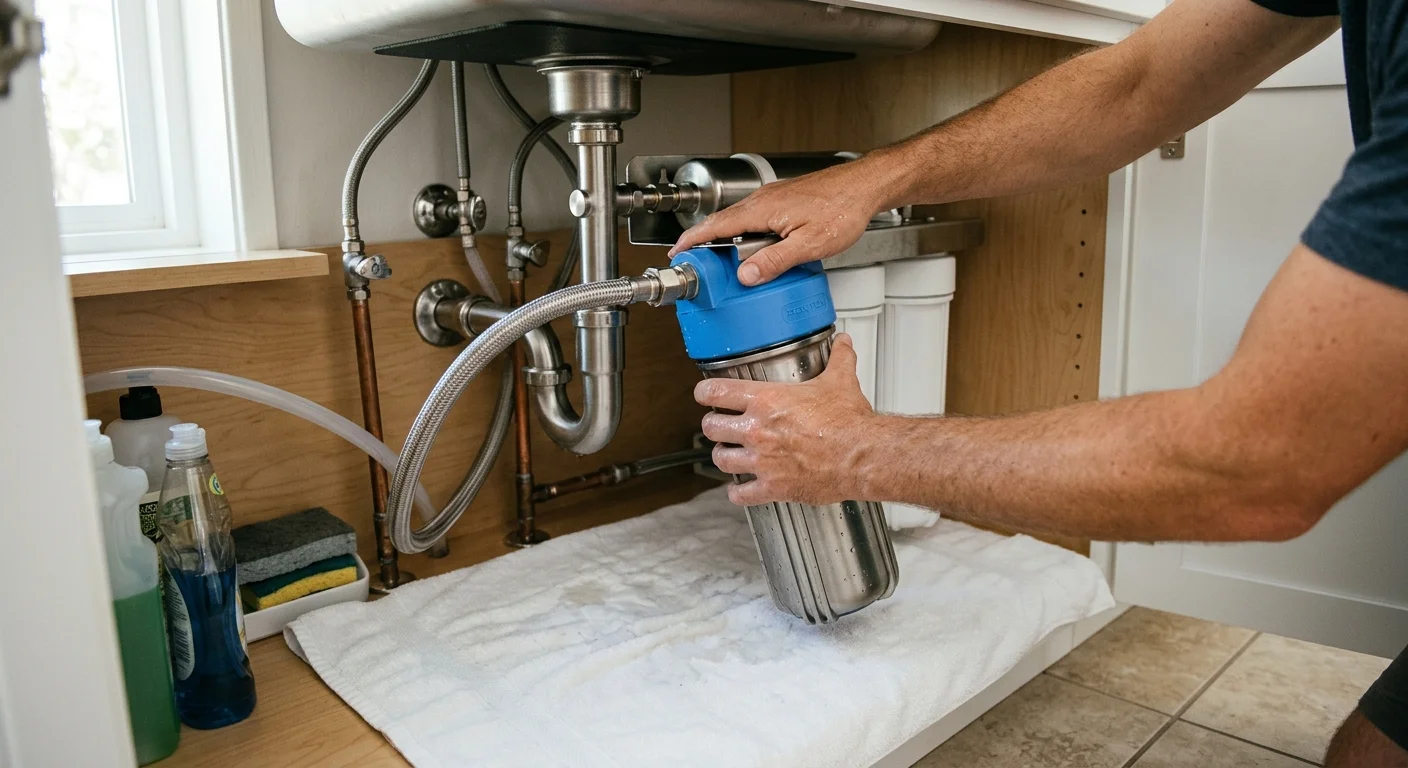
Empty the cabinet so water can’t reach stored supplies. Put a towel across the cabinet floor. Center the bucket under the housing, not just beneath the tubing. A full housing can release more water than its appearance suggests.
Take a clear photo of the tubing and valve positions. That gives you a reference if anything moves. Check for wet fittings, damaged tubing, or a cracked housing before starting. A cartridge change won’t repair those problems.
If you’re still choosing a system, review the differences between cartridge types and layouts. Our Chula Vista under-sink filter guide explains common selection points. You can also see how referred pros handle under-sink drinking water filtration.
Shutting off supply and relieving pressure at the faucet
Locate the small feed valve serving the filter. Don’t assume every valve under the sink controls the same line. Trace the filter’s inlet tubing back to its connection. If you can’t identify the supply, stop before turning anything.
Close the filter feed valve using its normal handle. Don’t force a stiff or corroded valve. Forcing it can turn a cartridge replacement into a valve or tubing repair. If the valve begins dripping around its stem, leave the cabinet open and contact a licensed pro.
Open the filtered-water faucet after closing the supply. Let the remaining flow slow and stop. This relieves pressure inside many standard housings and makes the housing easier to remove.
Some filter heads have a pressure-release button. If the manual directs you to use it, cover the button with a towel and press it over the bucket. A small amount of water may escape. Don’t press an unfamiliar button unless the system instructions identify its purpose.
Keep the filtered faucet open while loosening the housing. If water continues flowing steadily, the feed valve may not be fully closed. Stop and check the valve before opening the housing.
Never remove a housing while it remains pressurized. If the housing won’t loosen after the faucet stops flowing, confirm the shutdown procedure in the manual. A housing wrench gives grip, but it doesn’t fix trapped pressure or incorrect threads.
Removing the old cartridge without flooding the cabinet
Slide the bucket directly beneath the housing. Place another towel around the tubing connections. The goal is to catch water from the housing without pulling on the filter head.
Support the filter head with one hand. Use the housing wrench only where the manufacturer shows it. Turn the housing in the direction marked on the unit or stated in the manual. Viewing angles under a sink can make the direction confusing, so don’t rely on memory.
Loosen the housing slowly. Pause after the seal breaks. This lets trapped water drain into the bucket instead of running across the cabinet. Keep the housing upright as you lower it.
Lift the old cartridge straight out. Note which end faced upward. Take another photo if the cartridge has an offset opening or alignment feature. Don’t copy the orientation from memory when the replacement has printed arrows or a marked top.
Pour the housing water into the bucket. Inspect the removed cartridge for deformation, a damaged end cap, or material that has shifted. Don’t treat appearance alone as a water-quality diagnosis. Color and residue can have several causes, and a cartridge can’t identify what entered the water.
Wipe the empty housing with a clean cloth. Follow the manufacturer’s cleaning directions. Don’t add cleaners, disinfectants, or lubricants unless the instructions specifically approve them for that housing.
Look at the threads and sealing surface under good light. Cracks, deep scratches, or damaged threads call for more than a routine cartridge swap. Don’t try to hide damaged parts with tape, extra force, or an improvised seal.
Seating the new cartridge and checking the O-ring
Compare the old and new cartridges before installation. Check the model marking, length, end shape, and orientation. If those details don’t match, pause and confirm the correct replacement.
Remove the O-ring from its groove only if the manual permits it. Wipe the groove and inspect the ring under bright light. The O-ring should sit flat without twists, cuts, flattened sections, or embedded debris. Replace a damaged ring with the exact size specified for that housing.
Don’t substitute a ring because it appears close. A slightly different thickness can prevent the housing from sealing. If the manufacturer allows lubricant, use only the type it specifies. More lubricant doesn’t repair a worn or damaged O-ring.
Set the O-ring evenly into its groove. Run a clean finger around the ring to confirm it hasn’t rolled or lifted. Keep it away from the housing threads unless the system design places it there.
Insert the new cartridge in the direction shown on its label or in the manual. Center it on the housing locator. A cartridge sitting at an angle can block the housing before the threads engage.
Raise the housing straight toward the filter head. Turn it by hand at first. Stop if the threads bind, tilt, or feel gritty. Back it off, check alignment, and begin again. Cross-threading can damage both the housing and head.
Hand-tighten the housing according to the manual. Use the wrench for final tightening only when the manufacturer calls for it. Excess force can pinch the O-ring or make the next replacement harder.
Flushing the line and checking for leaks
Leave the cabinet empty and keep the bucket in place. Confirm that the housing is seated and the filtered faucet is positioned as the manual directs. Then open the feed valve slowly.
A slow opening gives you time to spot a leak before full flow reaches the housing. Watch the housing seam, inlet connection, outlet connection, valve, and tubing. Don’t focus only on the housing cup.
The faucet may release air as the housing fills. Follow the cartridge manufacturer’s flushing directions exactly. Flush requirements differ by cartridge, so don’t substitute a guessed time or water volume. Don’t drink from the filtered faucet until the required flush is complete.
Use a dry cloth or paper towel to check each connection. A small bead can be difficult to see against a metal fitting. Dry the area first, then check again while water is flowing.
If water appears at the housing seam, close the feed valve. Open the filtered faucet again to relieve pressure. Remove the housing and inspect the O-ring placement, cartridge alignment, threads, and sealing surface. Don’t tighten a leaking housing while it remains pressurized.
A leak at a tubing connection needs separate attention. Confirm the tube hasn’t been pulled, bent sharply, or partially released. Don’t dismantle an unfamiliar fitting without its instructions.
After the flush, close the faucet and inspect everything again under normal standing pressure. Leave the cabinet open until you’re confident it’s dry. Check the towel after several uses. Fresh moisture means the connection needs another inspection.
When the cartridge isn’t the problem and a test makes sense
A new cartridge won’t correct every taste, odor, flow, or leak complaint. Low flow can also involve a partly closed valve, bent tubing, a blocked faucet component, or another filter stage. A cracked housing, damaged head, or leaking fitting also needs repair rather than another cartridge.
Start with the simple checks. Confirm the replacement model and its direction. Make sure the feed valve is open and the tubing hasn’t folded behind stored items. Review the manual for any reset, venting, or stage-specific instructions.
Don’t identify contaminants from taste, smell, color, or cartridge appearance alone. Testing gives you a better basis for choosing treatment. Filter Pros San Diego can arrange a free in-home water test and connect you with a separately licensed Water Filtration pro.
Local water conditions aren’t identical across San Diego County. The verified authority is the current Consumer Confidence Report from the agency serving the property. Hardness can vary by service area and season.
For the City of San Diego system, Public Utilities reports an average hardness of about 16 grains per gallon, or 276 parts per million. It reports a range of 16 to 18 grains per gallon, or 272 to 284 parts per million, depending on water demand and location. Those figures don’t apply countywide or to private wells.
A test makes sense when the problem continues after a correct replacement. It also helps when the cartridge’s purpose is unclear or the water source has changed. Bring the cartridge label, model number, and current water report to the conversation.
When to call us
If the shutoff leaks, the housing is damaged, or tubing must be changed, stop and use a licensed Water Filtration pro. We can arrange testing and connect you with a separately licensed pro, whose license you can confirm through the CSLB license check. Call us at (858) 400-6508 to set up a free in-home water test.